Est. reading time: 10 minutes
How To Rank High on Google: SEO Audit
Ranking top of page for Google not only increases your website’s traffic and leads, but also adds to its credibility. People generally regard the highest-ranked websites as being the most authentic. This is why a quarter of all Google searches (25%) end with the user clicking on the very first search result. The CTR percentage keeps dropping as we move down the list, with the 10th search result getting only 2.5% clicks. And unsurprisingly, it gets a lot grimmer as we move beyond the first page; only 5% of all traffic is generated by websites not on the first page.
If you are tired of seeing competitor websites outrank you in the Google search results, you have landed at just the right place. This article will be the first in a 3 part series of articles which will talk about everything you need to know to rank top of page for Google. Here’s what’s covered:
- Part 1: Understanding Google Ranking & SEO Audit/Analysis
- Understand how Google ranks websites.
- See where you are currently standing in terms of SEO.
- Part 2: On-Page SEO Improvements.
- Implement on-page SEO fixes.
- Part 3: Off-page SEO and other SEO improvements
- Matching search intent.
- Building Page authority
- Avoiding Google penalties
- Track your SEO performance.
Understand how Google Ranks Websites
Google is a search engine, and an enormous one. Google staff can’t possibly analyse all 2 billion websites on the internet themselves to determine which ones are relevant to your search in split seconds.
Google uses bots to find and crawl webpages to determine the contents and where to rank it in search results. It’s vital to understand that this process is completely automated, and to keep this in mind when developing your site.
How do bots “decide” a page’s rank? Of course, bots can’t think for themselves, nor can they comprehend what they crawl. To “understand” what a webpage is really about, and more importantly, if it’s relevant, Googlebots are programmed with algorithms (rules) to look for certain signals that altogether determine a page’s rank in search results.
A lot of what makes Google’s ranking algorithms tick is still a mystery (presumably to prevent bad actors from gaming the system), but there are certain aspects of it that every website owner should know.
The first, and arguably the most important, is that the algorithm changes frequently. Google’s senior executives (like John Mueller in this tweet) have repeatedly confirmed it. Even though most of these changes aren’t made public, some are. So, as a website owner, you should make an effort to stay updated.
Moz’s update history of the algorithm is a brilliant, chronologically arranged resource to see what changed and when. There is also the Google Search Central Blog where you can find core algorithm updates, and new search features.
The second is the mobile-first update that came out in 2019. In the release notes, Google announced that they will “predominantly” be using mobile versions of websites for indexing and ranking. This is very important because if your website isn’t mobile friendly, then you can forget about being top of page for Google.
Regardless of how informative or keyword-rich your content is. Google also shared a list of best practices for mobile-friendly websites with the update, which must be followed at all costs.
The third is the Hummingbird update that came out in 2013. This was revolutionary because it forever changed the way Google ranked websites. Instead of considering keywords literally, Google’s algorithm was modified to understand the context and underlying intent of the search.
For example, if someone searches best place for Thai, Google, powered by intelligence from billions of similar historical searches, will determine that the person is actually looking for Thai food, instead of best places for Thai people to live.
As website owners and content creators, this meant that keyword-rich content on its own won’t be enough anymore. You will have to match search intent.
What is SEO?
So now you know that Google’s ranking process is completely automated. While Googlebots are “clever”, it is after all just software. Unlike a human, it can’t simply look at or read your page and understand what it’s about.
This means that in order for Google to find your website, deem it trustworthy and relevant, and therefore rank it well on their search engine, you need to give their bots as much accurate info about your website as possible. In other words, help Google help you.
This is what is called Search Engine Optimisation (SEO). In Google’s words: “The better that Google can understand your site, the better we can match it to people who are looking for your content.”
Where Are You Currently Standing in Terms of SEO?
Before you try to get where you want to be, you need to first realize where you stand.
Step 1. Site Audit
There are many tools that can perform a SEO audit of your website, and we will briefly compare the best ones below. Depending on your budget and/or website size, you may choose the most viable option.
Google Search Console (Free)

Google Search Console is a 100% free SEO performance tracking and analysis tool. Made by Google and completely free, this tool is an absolute must for website owners. There is a dedicated performance tab where you will get clicks, impressions, CTR, and other relevant statistics for search queries, pages, etc. You will also be able to check for index coverage, URL issues, mobile usability, link overview (internal and external, site and text), page experience, core web vitals, and potential enhancements.
You can even schedule reports of this data using Google Data Studio, it works hand-in-hand.

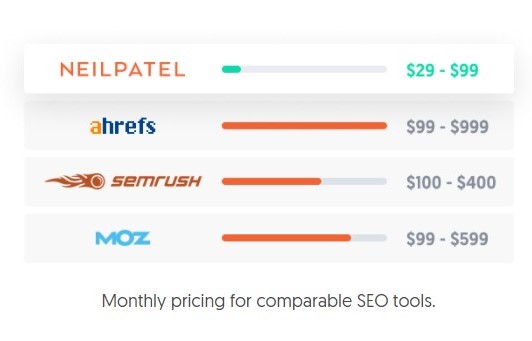
Ubersuggest’s SEO explorer
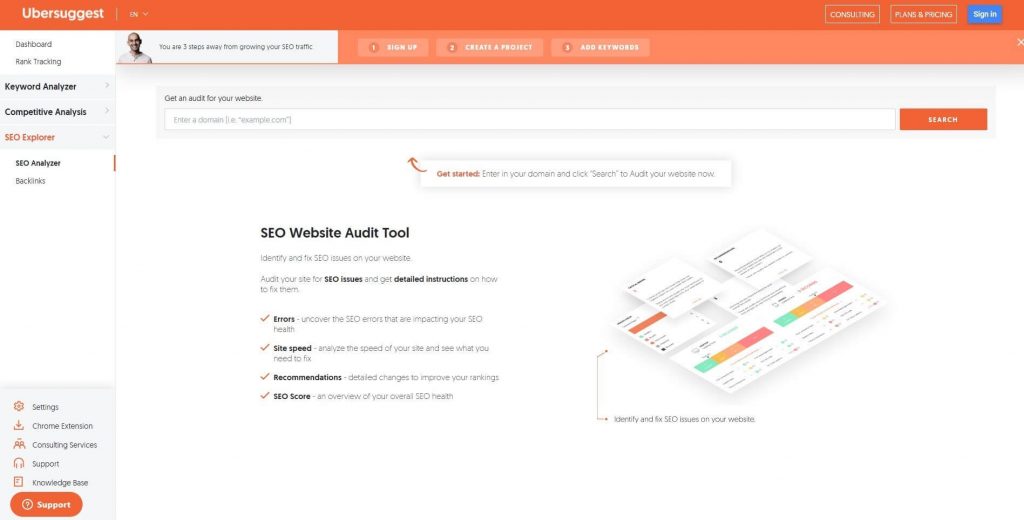
Ubersuggest is another great SEO analysis tool. It offers all the features like rank tracking, site audit, keyword research, competitive analysis, and backlinks, bundled up in one tool. Just like Ahrefs, it also checks against numerous SEO issues, and gives recommendations on how to make it better.
It’s free for websites with under 150 pages. For bigger websites, the following three models are offered: Individual, which is priced at $12 per month; Business, which costs $20 per month, and Enterprise/Agency, which sets you back $40/month.
Sistrix
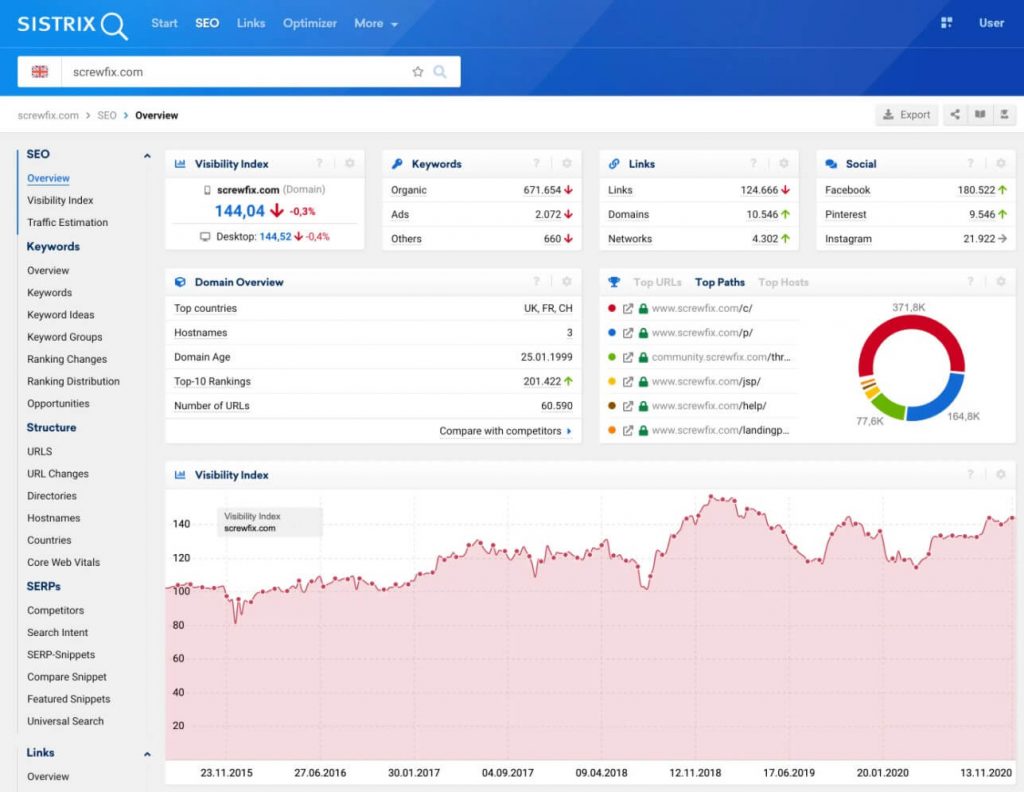
Sistrix is one for the larger companies, as it’s feature-rich, but also relatively expensive. It has some exciting features like the visibility index, which is a metric calculated by the Sistrix algorithm after repeatedly analysing Google searches for millions of terms.
It also offers a thorough competitor analysis, automated on-page audit and optimization, and intelligent content assistance (keyword coverage, search intent matching etc.).
Sistrix features are divided across modules, and you can pay for as many modules as you want. The SEO module costs approximately $120 (100€) per month, but it doesn’t cover backlinks or optimization suggestions.
For those, you have to consider purchasing the Links and/or Optimizer modules for an additional $120 (100€) each.
Ahrefs’ site audit

Site audit by Ahrefs is a widely used SEO analysis tool. It checks for over 100+ pre-defined SEO issues, including HTML tags, performance, broken pages, localization, and external pages etc.
For the more experienced users, it gives a way to apply multiple filters on thousands of data points, for all your website’s pages. It can execute JavaScript, crawl mobile websites, and show you all the relevant details for a page via a single click.
It’s a paid tool, with two subscription models: Lite, which costs $7 for 7 days, and then $99 per month; and Standard, which also costs $7 for the first 7 days, and then $179 per month.
For the purpose of this article, we will be using the Ahrefs’ site audit tool.
Using Ahrefs’ Site Audit
- Log in to Site Audit.
- Select New Project, and paste your domain in the Scope & seeds section.
- The tool will now search for seeds. If you see a link with the 301 (redirects) code in the results, uncheck it, and click Next.
- The next step is ownership verification. This is optional, so we are going to skip this. However, if you want, you can verify ownership using any of the three available methods.
- On the Crawl Settings page, most of the default values should be fine. However, it’s recommended to turn on the Execute JavaScript and Check HTTP status of external links switches under Crawl Settings. Additionally, if you have a really big website, you may also want to change the Max number of internal pages and Max crawl duration (hours) settings under Limits (For websites with more than 10,000 pages, just set the max duration to 168 hours to ensure catching everything). Once done, click Next.
- If you want to just run a one-time crawl, toggle the Scheduled crawl switch to off. Otherwise, specify a frequency for the scheduled crawl, along with the day and time for it to run. Click Create project.
- The crawl will now begin, and may take hours to complete. You should be able to monitor the progress on the site audit dashboard.
- Once the crawl completes, you can head over to the Overview screen to see your website’s major issues.
- The health score on the left indicates the percentage of URLs on your website with critical problems.
- You will also be able to see the total crawled URLs, along with the URLs with errors.
- The HTTP status codes of internal URLs graph will show you the various reasons why some of your pages aren’t loading successfully. You may click on any part of the graph to open the problematic URLs in the data explorer.
- Using the data explorer, you can customize all your website’s raw data according to need. Some filters are pre-set; however, you can play around with them as you go along.
- The HTML tags & content section on the Overview screen is a great place to see which tags or content is missing from your pages. Focus on the bad duplicates, and Not set or empty ones. You can click on any part of the bar to open the problematic pages (ones with duplicated content or missing tags) in the data explorer.
- Lastly, scroll down to the bottom of the Overview page, and go through all the issues on your website. You may see issues related to internal pages, performance, HTML tags, content quality, outgoing and incoming links etc. You can filter issues by the three main types: errors, warnings, or notices. The issue tab also offers actionable advice regarding potential fixes for all the issues. Just click on the info icon at the end of any issue row to see more details about the issue and the suggested fix.
Step 2. Analyse Google Traffic
Now let’s see what the organic traffic for your website is looking like. Which pages are performing the best? Has the traffic increased or decreased over the past few days/weeks/months? To do this, we will use Google Analytics.

If you currently don’t have a Google Analytics account, then sign up here. Bear in mind that Google Analytics only starts collecting traffic data after you have signed up, and added the global site tag to your website’s HTML.
This tag will actually be responsible for sending data back to the Analytics platform. Hence, it will not provide any historical data dating prior to tag implementation on your site. To know more, check out this step-by-step guide to set up Google Analytics for your website.
If you have only just signed up and added the tag, wait at least a few days for data to accumulate, and then follow these steps to analyse your traffic. Alternatively, delve right in:
- While on the main Google Analytics dashboard, select Acquisition > Overview > Organic search. You should be able to see a graph of organic traffic over a period of time. You can change the time period from the dropdown on the right.
- To get a quick access to more insights, click the Insights icon on the right corner, and select from the various available options.
Step 3. Check # of Indexed Pages
Non-indexed pages don’t even get considered for rankings. To check just how many pages of your website are indexed, follow these steps:
- Log on to your Google Search Console dashboard.
- From the menu on the left, click Google Index > Index Status.
- The total number of indexed pages for your website will be under Basic > Total Indexed.
If you don’t use Google Search Console, here’s another way:
- Go to google.com and enter site: followed by your domain name. e.g. site:mydomain.com
- The number of search results will represent the number of indexed pages on your website. In the screenshot below, you can see that aig.com has 8450 indexed pages.

Once you have found the number of indexed pages, it’s recommended to compare it with the number of internal pages found during the Ahrefs site crawl. Go to Site Audit > Project > Internal pages to do so.
If you note a discrepancy i.e. # of internal pages > # of indexed pages, then it’s highly likely that some of the pages are not indexed. To verify this, scroll down to the Issues section, and look for any issues with Noindex follow page or Noindex page tags. Clicking the issue should take you to the list of non-indexed pages.
Step 4. Check Loading Times
It’s a well-known fact that Google considers website speed while ranking websites. To see all the slowly loading pages of your website, we once again turn to the Ahrefs’ site audit.
- From the overview page, scroll down to the Performance section.
- If you see Slow page anywhere in the list, click it to see all the troublesome pages.
- You will now be able to see the Time to first byte and Loading time in milliseconds for each page.
Step 5. Check for Broken Pages
Broken pages are simply ones that don’t work. We can use the free W3C link checker to find them:
- Head over to W3C Link checker.
- Enter the URL of your website. Hit Check.
- Wait for the scan to complete. Once done, scroll down to the Results section to see the list of broken links.
- Go through each link one by one, and either fix or delete them.
That concludes the first instalment of our SEO how-to article series. In the following articles, we will talk about how to improve on-page and off-page SEO, avoiding Google penalties, and other SEO tricks and tips to help you rank top of page for Google. Stay tuned!
